This chapter illustrates how to add a new project using Visual Studio as the standard programming environment. The clients are automatically generated by using the delivered WSDL files. The bundled clients are not used from PTV. This would be an alternative solution.
Click into the following figures in order to obtain the full screen of each image.
If your already know how to consume web services with .NET you can skip this section. Otherwise, the screenshots below guide you through the steps that are necessary to create a new .NET project. We recommend using the current version of Visual Studio. Anyway, the following screenshots are generated via Visual Studio 2012.
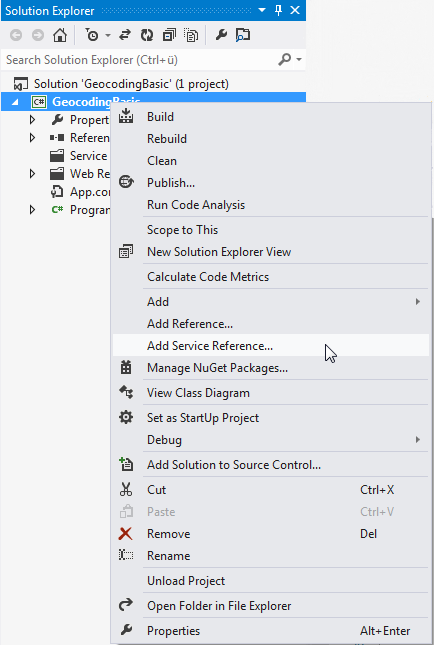
Step 1: Select Add Service Reference... from the context menu of your recently created project.
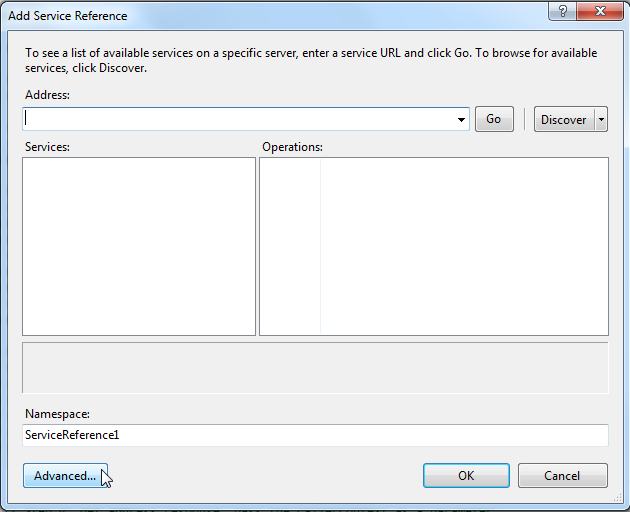
Step 2: Select Advanced... in the "Add Service Reference" - dialog.
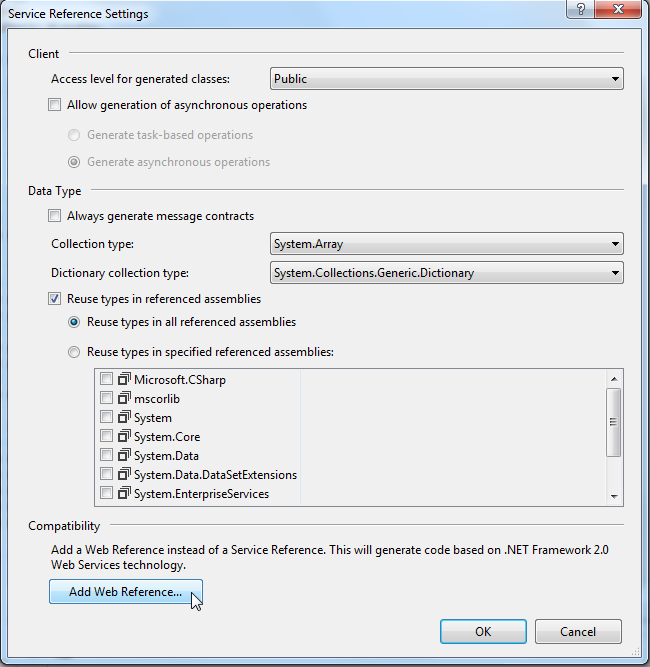
Step 3: Click Add Web Reference... in the "Service Reference Settings" - dialog.
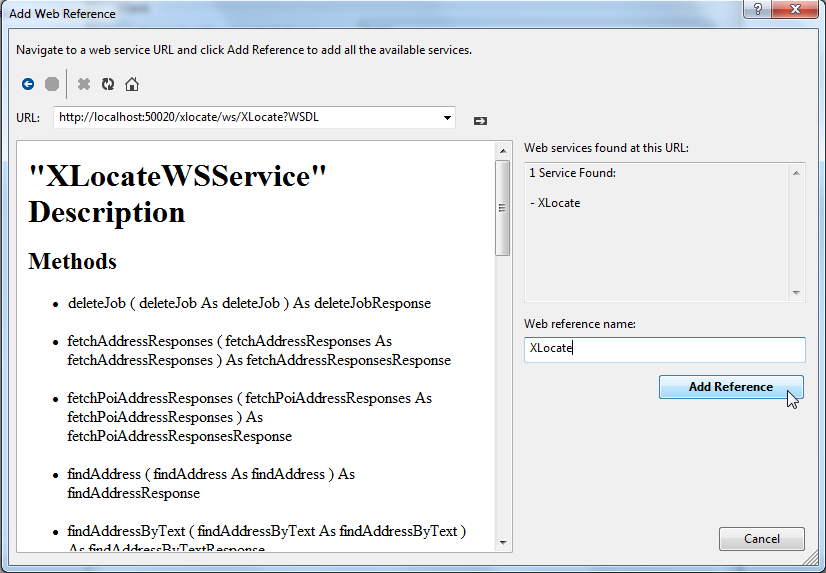
Step 4: Enter the URL of your PTV xServer (exemplarily used: PTV xLocate Server) and click on WSDL file.
Step 5: Give your web service a name, which shall be used as the namespace. Finally click Add Reference, in order to add the service to your project.
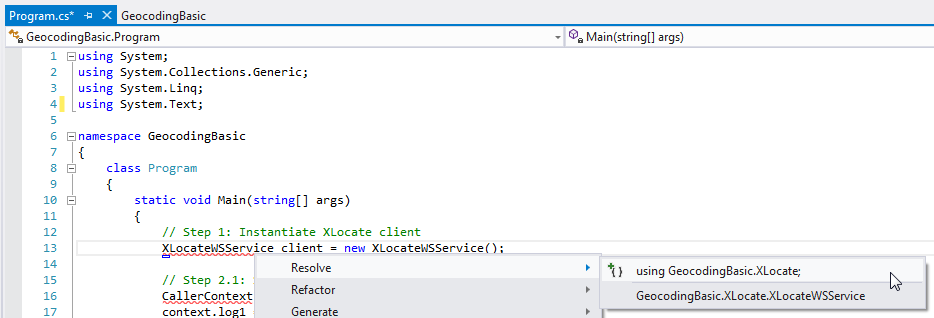
Step 6: Now, you are ready to generate your first application connected to the corresponding PTV xServer.
How to use shared types in .NET is separately described on the following sub-page.
Copyright © 2025 PTV Logistics GmbH All rights reserved. | Imprint